
Honestly, if you’ve ever wondered how to get started with your Arlo devices or found yourself stuck at the “register device” step, you’re not alone. The whole process is designed to be user-friendly, but like any new tech, it helps to take it slow and understand each step clearly. Think of it as pairing your phone with a new pair of wireless earbuds—once you get the hang of the “sync” part, everything just clicks. So, let me explain how to register your Arlo smart home devices using the mobile app, step by step, with tips to troubleshoot common hiccups along the way.
Setting Up Your Arlo Account on the Mobile App
Before you can even think about registering your devices, you need an Arlo account—that’s your gateway to controlling all your smart home gear. Downloading the Arlo app from the App Store or Google Play is the easy part. Once it’s installed, opening it for the first time feels like stepping into a command center for your home security.
Here’s the thing: creating an account is straightforward but important. You’ll provide a few basic details like your email and a password, which is basically the code that unlocks your home’s digital control panel. The app might ask for permissions to use your location or send notifications. These settings are key later for things like smart alerts and geofencing, so don’t skip them.
If you already have an account, logging in is a piece of cake. Just enter your credentials, and you’ll land on the app’s home screen. If you forgot your password—hey, it happens!—there’s a reset option that emails you a link to start fresh. Once logged in, you’re ready to register your first device.
Preparing Your Arlo Device Before Registration
You might be wondering why preparation even matters if the app promises to do all the heavy lifting. Well, here’s the thing: your Arlo device needs to be in the right state to successfully pair with the app. Imagine trying to connect to Wi-Fi with the router turned off—it just won’t work.
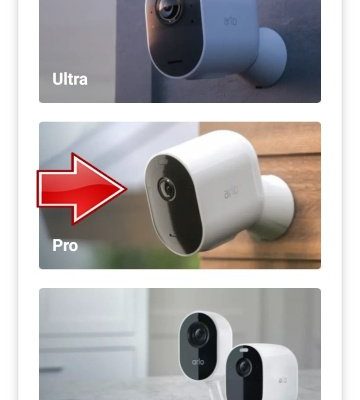
Start by making sure your device is fully charged or has fresh batteries installed. Many Arlo devices come with rechargeable batteries, which you can top up using the included USB cable. If your device uses replaceable batteries, pop in new ones to avoid a mid-registration timeout due to low power. The app often checks battery status, so this step saves you troubleshooting time.
Next, perform a reset if your device has been used before or if you’re experiencing connection issues. Most Arlo cameras have a small reset button, usually hidden in a pinhole. Holding that button for about 10 seconds resets the device to factory settings—kind of like giving your device a fresh start. This makes the device discoverable and ready to pair with your app without confusion from old sync settings.
How to Register Your Arlo Device Using the Mobile App
Okay, now the fun part: actually registering your Arlo device through the app. You’ll want to open the Arlo app and look for the “Add Device” or “Set up New Device” option—this is your virtual handshake with the hardware.
Once you select it, you’ll be guided to choose your device type—camera, doorbell, base station, etc. Selecting the right one helps the app load the correct setup instructions and sync codes. After that, follow the on-screen prompts, which usually involve scanning a QR code on the device or entering a serial number manually. This serial number acts like an ID badge for your device in Arlo’s system.
The app will then search for your device over Wi-Fi or Bluetooth, depending on the model. This is where having good Wi-Fi signal strength matters. If it’s struggling to find your device, try moving your phone and the device closer to your router. Once connected, you’ll be asked to name your device—because “Backyard Camera 1” is way easier to remember than a string of numbers.
Connecting to Wi-Fi and Syncing Your Device
Connecting your Arlo device to Wi-Fi is the core of registration. The app will prompt you to select your home Wi-Fi network and enter your password. Keep in mind most Arlo devices only work with 2.4 GHz Wi-Fi, not 5 GHz bands, so double-check your router settings. The app usually warns you if you’re on the wrong frequency.
Once your device is linked to Wi-Fi, it will start syncing with your Arlo account. Think of syncing like your device introducing itself to the app and saying, “Hey, I’m ready to protect!” This can take a minute or two, so don’t panic if it seems slow. If syncing fails, the app will offer troubleshooting tips or the option to reset and try again.
Troubleshooting Common Registration Issues
Registration sounds simple, but you might hit a few bumps along the way—totally normal. One common frustration is when the app can’t discover your Arlo device during setup. This usually happens because the device isn’t in pairing mode or your phone’s Bluetooth or Wi-Fi is off.
If you run into this, start by double-checking that your Arlo device is powered on and has been reset if necessary. Sometimes, switching your phone’s connectivity off and on again can help. Also, remember to grant the app permissions to access your location and network—it’s necessary for syncing and security.
Another issue is a failed Wi-Fi connection. Make sure you’re entering the right Wi-Fi password, and confirm your router supports 2.4 GHz bands. You might want to temporarily disable VPNs or firewalls on your phone that could interfere with the app’s communication.
If all else fails, the app offers a “Remove Device” option so you can start the registration process fresh. Honestly, taking a short break and trying again usually fixes most problems here—tech can be finicky, just like us.
Why Registering Your Device via the Mobile App Matters
You might be thinking, “Why not just set it up on my computer or use a universal remote?” Here’s the thing: registering your Arlo devices through the mobile app unlocks the full smart home experience. The app is designed specifically for Arlo products, so it understands the unique code, sync, and security requirements that generic tools can’t manage.
The app gives you instant access to live video, motion alerts, and settings that you can tweak on the fly. Without registration, your devices are basically offline—like having a fancy camera that never takes pictures. Plus, the app handles software updates, battery monitoring, and troubleshooting guides automatically, keeping your system secure and smooth without extra effort.
In short, the mobile app turns your Arlo gadgets from simple cameras into a smart, responsive security network you can control from anywhere.
Keeping Your Arlo Devices Registered and Updated Over Time
Registering your device isn’t a one-and-done deal. Think of it like syncing your earbuds before every jog—you want the connection to stay solid and the performance sharp. The Arlo app helps keep your devices registered and updated automatically, but it’s good to know how to manage this yourself.
Whenever you get a notification about a firmware update, don’t ignore it. These updates often fix bugs, improve battery life, or add cool new features. The app usually downloads and installs them in the background, but sometimes you’ll need to confirm the update manually.
If you ever swap routers or change your Wi-Fi password, you’ll need to re-register your devices to the new network. Luckily, the app guides you through this reset-and-sync routine smoothly, so you don’t lose that sense of security.
Finally, periodically check the app for battery status—if your device shows low power, recharge or replace batteries promptly to avoid losing connection or missing alerts.
Wrapping It Up: Your Arlo Devices, Connected and Ready
At the end of the day, registering your Arlo smart home devices through the mobile app is the critical step that turns your investment into a powerful security system. It’s the moment your pieces click together and your home starts watching back. Taking it one step at a time—setting up your account, prepping your device, syncing, and troubleshooting—makes the process less intimidating.
Remember, the app is your best friend here. It guides you gently through each phase and helps keep your system running smoothly. So, next time you’re holding that sleek Arlo camera in your hand or scanning its QR code, think of the mobile app as the key turning in the lock—giving you peace of mind right from your phone screen.