Honestly, figuring out the warranty on a GE oven or range isn’t as complicated as it might seem at first. It’s a bit like syncing a remote control—you just need to know the right steps and where to look. Whether you got your range recently or years ago, understanding how to check your warranty can save you stress and money. Let me explain how you can easily find out your GE oven’s warranty status, step by step.
Why Knowing Your GE Oven Warranty Status Matters
Here’s the thing: warranties aren’t just fine print or a sales gimmick. They’re your protection against unexpected breakdowns or faulty parts. GE ovens and ranges come with specific warranty periods—usually covering parts and labor for a set time—and knowing if yours is still valid helps you decide your next move.
Imagine your oven’s control panel glitches out. If you’re still under warranty, you might be able to get the repair done at little or no cost. But if it’s expired, you’ll want to start budgeting for repairs or considering replacement. So, having that warranty info upfront is like checking the battery life before heading out on a long trip—you avoid surprises.
Plus, sometimes GE offers extended warranties or service plans. Understanding your current warranty also helps you weigh whether those add-ons might be worth it moving forward. It’s all about staying in the driver’s seat when it comes to your appliance’s health and your wallet.
What Information You Need to Check Your Warranty
Before you dig into checking, you’ll want to gather a few key details. It’s kind of like setting up your remote for the first time—you need the right code and a little patience. For your GE oven or range, here’s what usually helps:
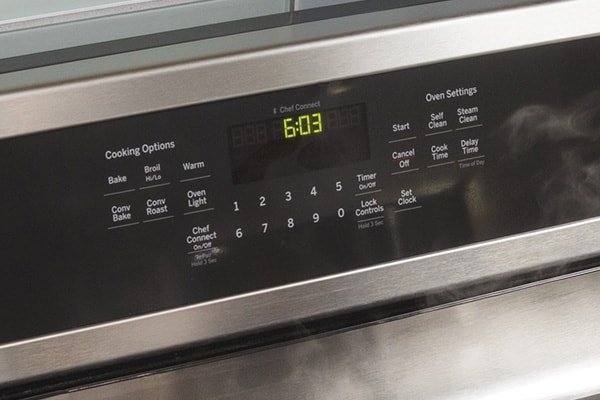
- Model Number: This is the specific number that identifies your appliance’s design and features. It’s usually found on a sticker or plate inside the oven door, on the frame, or near the back.
- Serial Number: Think of this as your oven’s unique fingerprint. It’s often right next to the model number and helps GE track exactly when and where your oven was made.
- Purchase Date or Receipt: While not always mandatory, having your purchase date or a receipt handy helps confirm if you’re still inside the warranty window.
Don’t worry if you haven’t kept your receipt in that shoebox of papers. The serial and model numbers are usually enough to get you started. They’re the kind of info you’d jot down once and keep tucked somewhere safe, like syncing your remote once and putting the manual away.
How to Find Your GE Oven’s Model and Serial Numbers
You might be wondering: “Where exactly do I find these numbers?” It’s a good question because GE places these labels in a few spots depending on the oven or range model. Here’s a quick tour:
- Inside the Oven Door Frame: Open your oven door fully and look along the edges of the frame. You’ll often see a silver or white sticker with the model and serial.
- On the Back of the Oven or Range: If you can safely pull the appliance out a bit, check the rear panel for another label.
- On the Frame Behind the Bottom Drawer: For ranges with a storage drawer, open it and look inside or on the side walls for the label.
Let me paint a picture: you open your oven door, look down the left edge, and there it is—a sticker with a model number like “JTS3000SNSS” and a serial number right below. It’s like finding the secret code that lets you sync your remote or unlock warranty info. Keep in mind that the label may look worn or faded if your oven is older, so take your time.
Checking Warranty Status Online Through GE’s Website
Now that you’ve got your model and serial numbers, you can jump online to quickly check your warranty status. GE Appliances has a pretty straightforward tool for this. Here’s how to approach it:
- Head over to the GE Appliances Warranty page.
- Look for the section where you can enter your appliance’s model and serial numbers.
- Type in those numbers exactly—this is your “code” to sync with GE’s database.
- Submit the form and wait a moment while it pulls up your warranty information.
What’s handy here is that this tool instantly tells you whether your appliance is within the standard warranty period or if it’s expired. It’s like pressing a button on your remote and seeing the status light blink—quick and easy. Plus, you can often find additional tips on how to extend or register your warranty if you haven’t done so.
Using Your GE Account to Track Warranty and Repairs
If you’re the type who likes to keep things organized (or want to avoid hunting for serial numbers each time), setting up a GE account is a smart move. Once you register your oven or range on GE’s site, everything syncs in one place—warranty dates, product manuals, and even repair history.
Here’s a simple idea of how to set it up:
- Create a free account at the GE Appliances website.
- Add your oven or range by entering the model and serial numbers.
- Register your purchase date if possible to confirm warranty start.
After this setup, you can log in anytime and instantly see if your warranty is active or if you need to think about repairs or replacements. Honestly, it makes troubleshooting or calling customer support way smoother because all your info is right there, like having your remote’s batteries fully charged before use.
What to Do If Your GE Warranty Has Expired
Finding out your GE oven’s warranty has expired can feel like a kick in the gut, but don’t panic just yet. There are still options to explore before you decide to buy a new range or oven.
- Consider GE’s Extended Service Plans: Sometimes you can buy extended coverage—even after the original warranty ends. This can cover repairs or parts for a certain period.
- Look Into Authorized Repair Services: GE-certified technicians can diagnose and fix issues. Even if it costs out of pocket, using authorized repair can save time and prevent further damage.
- DIY Troubleshooting: For minor issues, simple resets or replacing easy parts like batteries (if your oven’s control uses one) can sometimes fix problems. Just be sure to consult your manual.
Here’s the thing—knowing your warranty status lets you make smart choices instead of guessing. Sometimes spending a little on a repair is worth it to extend your oven’s life, especially if the problem is minor and fixable.
Common Challenges When Checking Warranty and How to Solve Them
You might bump into a few hiccups while checking your GE oven warranty. For example, the serial number could be hard to read, or GE’s website might not immediately find your appliance information. Here’s what you can do:
- Faded or Missing Labels: If the sticker is gone or unreadable, try to find your purchase receipt or check if your retailer keeps records.
- Website Errors: Sometimes the online tool will say “not found” if the serial number was entered incorrectly or the appliance wasn’t registered. Double-check your input or contact GE support directly.
- Syncing Device Issues: When using the GE app or remote to connect with your oven for troubleshooting or warranty info, a reset or battery change might be needed to fix pairing problems.
Honestly, a little patience and attention to detail go a long way here. If all else fails, a quick call to GE’s customer service can often clear things up faster than you expect.
Wrapping It Up: Staying In Control of Your GE Oven Warranty
Keeping track of your GE oven or range warranty doesn’t have to be some dreaded chore. In fact, it’s kind of empowering—like knowing your remote control’s codes so you can fix it yourself or call the right help without fumbling. By locating your model and serial numbers, checking online, or creating a GE account, you put yourself in the driver’s seat.
Warranty info not only protects your appliance investment but also helps you plan ahead, whether that means scheduling a repair, buying an extended plan, or troubleshooting at home. So next time your oven acts up, you’ll know exactly where to look—and that makes all the difference when you’re trying to get dinner on the table without stress.