Let’s be honest: HVAC stuff can feel confusing, like trying to read a foreign language upside down. You might have heard “Carrier” is a reliable brand, but even the best systems have hiccups. Claiming your Carrier HVAC warranty shouldn’t feel like trying to solve a code or crack a safe. So, let’s go step-by-step—coffee in hand—as if we’re troubleshooting this together.
What Does the Carrier HVAC Warranty Cover?
Here’s the thing: not all warranties are created equal. Carrier HVAC warranties can vary depending on the model, where you bought it, and how it was installed. But in general, the warranty focuses on key parts such as compressors, heat exchangers, and certain electrical or mechanical components. This coverage is meant to shield you from unexpected repair costs if something major fails, usually due to manufacturing issues—not DIY mistakes or accidents.
Now, it’s easy to assume that “warranty” means blanket coverage for any issue. That’s not quite true. For example, if your system starts blowing cold air in the winter, a technician will check whether the problem is with a covered part. If they find user error (like not replacing a filter), the warranty might not help. But if it’s a faulty circuit board, you’re probably covered. Be sure to read the details in your specific warranty paperwork; some systems have a 10-year limited warranty, while others are shorter.
Let me explain what’s usually *not* covered. Routine maintenance, cleaning, or damage from storms generally falls outside warranty protection. Same goes for issues caused by improper installation. Think of the warranty as a backup plan for things you can’t control, not a catch-all for every HVAC hiccup.
How to Register Your Carrier HVAC Warranty
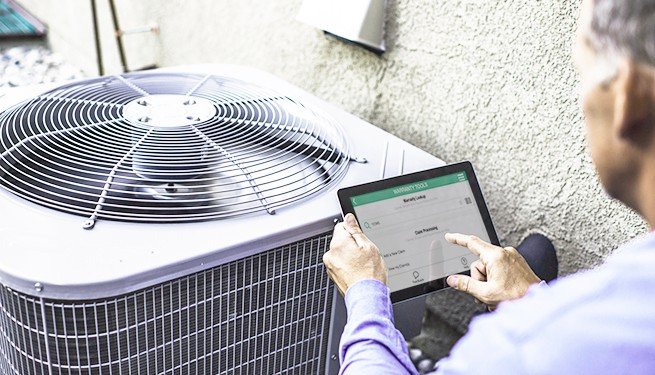
Before you can even think about making a claim, you need to register your Carrier HVAC system. Honestly, this step is often skipped because it feels extra—like registering your toaster. But for Carrier, registration is crucial if you want to take full advantage of that 10-year limited parts warranty. If you skip it, the warranty coverage usually drops down to 5 years, which is a big deal for a system meant to last a decade or more.
The process is simple but important. Grab your unit’s model and serial numbers—they’re usually printed on a sticker near the control panel or inside the main access door. You’ll also need your installation date and the name of the installer. Head to Carrier’s official warranty registration website. Enter the details, double-check for typos, and submit. That’s it!
You might be wondering if your installer will do this for you. Sometimes they will, but don’t count on it. Always confirm with your HVAC professional, and keep a copy of your registration confirmation email. It’s your proof in case there’s ever a code or paperwork issue down the line.
Steps to Claim a Carrier HVAC Warranty
So, your heat pump is rattling or the AC stopped syncing with your thermostat. What’s next? Claiming your Carrier warranty is a bit like following a recipe: missing one step can ruin the whole dish. Here’s how to go about it:
- Find your purchase documents: You’ll need the original invoice or proof of purchase, your warranty registration confirmation, and possibly the installer’s information.
- Contact your original installer or service provider: Carrier usually requires claims to go through the licensed dealer or company that put in your system. This helps troubleshoot whether the issue is parts, installation, or something else altogether.
- Let the technician diagnose the problem: They’ll inspect the system, check error codes, and do a deep dive to pinpoint the failure. The tech will decide if the issue is covered under warranty or if it’s a problem like dirty filters or a low battery in your thermostat remote (which aren’t covered).
- Submit the warranty claim: If the issue is eligible, the installer or dealer will usually handle the paperwork. Expect them to fill out forms, attach codes, and provide Carrier with all the necessary documentation.
- Wait for Carrier’s response: If approved, Carrier will supply parts or approve repairs. You’re usually on the hook for labor costs unless you bought extra coverage that includes it.
Sometimes things get stuck—paperwork is missing, or the code doesn’t match. Keep a record of every step, just in case you have to reset or resubmit a claim.
Common Problems with Carrier Warranty Claims (And How to Avoid Them)
Here’s where things can get a little tricky. People run into hiccups with warranty claims for a few common reasons. For starters, not registering the product within 90 days of installation is a classic pitfall. If you miss that window, your coverage can shrink by half. That’s like finding out your “all-inclusive” vacation is really room-only.
Another problem? Lost paperwork. You know that folder you never open, full of old receipts and manuals? That’s where your proof of purchase and registration confirmation should live. If you can’t provide these, Carrier might reject your claim outright—or you’ll have to hunt them down, which is not fun when you’re sitting in a hot or cold house.
Improper installation is another big one. Carrier will often ask for the installer’s license or warranty code. If you went with a friend-of-a-friend instead of a certified pro, you could run into trouble. When in doubt, always go with authorized dealers for both installation and repairs—your future self will thank you.
Sometimes warranty claims drag on due to communication issues. Maybe the installer didn’t submit the paperwork, or you missed an important email. Stay proactive. Follow up with your dealer and Carrier support so you’re not left waiting in limbo.
What To Do If Your Claim Gets Denied
It’s a sinking feeling: you go through all the steps, only to find out your Carrier HVAC warranty claim got denied. Don’t panic. There’s usually a reason, and sometimes you can still get things fixed. The first step is understanding why. Carrier or your installer should tell you if it was because of missing registration, outdated paperwork, a reset code not matching up, or an uncovered part. Be sure to read their message carefully.
If the denial seems unfair—maybe you believe the code should be valid, or the problem should be covered—contact Carrier’s customer service directly. Sometimes it’s a simple paperwork error or a miscommunication with the dealer. Be polite, but persistent. Point out your warranty registration, installation date, and all the steps you took.
There are times, honestly, when denial is final. In those cases, ask your installer for alternative repair options. For example, some parts can be replaced using generic or universal options, which might save money if you’re out of warranty. And if it’s a recurring problem, ask about troubleshooting tips to avoid a repeat performance.
If your claim does get denied, don’t write off Carrier’s support entirely—sometimes, appealing or clarifying the paperwork can turn things around.
Labor Costs, Extended Warranties, and Hidden Fees
You might notice that Carrier’s standard warranty often covers *parts*, not labor. That can trip people up. Let me explain: If a covered part fails, Carrier will send the replacement part at no charge, but you’ll usually pay for the technician’s time to install it. Depending on your repair, labor can be a significant chunk of the bill.
This is where extended warranties come into play. When you buy your Carrier HVAC system, you might be offered optional coverage that includes labor costs. Think of it as an “all-inclusive” upgrade. If you want total peace of mind—and you hate surprise expenses—this can be worth it. But always read the terms. Some plans only cover certain types of repairs or have strict reset and maintenance requirements.
Hidden fees are another reality to watch for. Even with warranty coverage, you could pay diagnostic fees, trip charges, or for things like batteries, remotes, or routine maintenance. Ask your dealer upfront what’s covered and what’s not. That way, there are no nasty surprises when the bill arrives.
Comparing Carrier’s Warranty with Other HVAC Brands
You might be wondering if Carrier’s warranty stacks up. Here’s what I’ve seen: Carrier’s 10-year limited parts warranty (when registered) is competitive, but not always the longest. Some brands offer lifetime coverage on major components, while others might throw in labor for the first few years. But Carrier’s partnership with authorized dealers makes their claim process smoother than some off-brand or online-only competitors.
Universal or generic HVAC parts might be tempting if your claim is denied, but remember: mixing and matching can lead to code issues, compatibility problems, or voided warranties. Always pair Carrier parts with a Carrier system for best results. If you must go outside the Carrier network, ask your installer if the part will work and how it might affect future troubleshooting.
So, why choose Carrier? Support is solid, parts are widely available, and their systems are known for reliability. But the warranty only works as well as your paperwork and installation. If you’re the type who likes DIY repairs or off-brand parts, weigh the risks carefully.
Keeping Your Warranty Valid: Maintenance and Best Practices
No one likes to think about maintenance, but it’s a big part of keeping your Carrier HVAC warranty active. Carrier sometimes requires annual professional check-ups to keep the warranty valid—like taking your car in for regular oil changes. Skipping routine maintenance, ignoring error codes, or letting batteries in your thermostat remote die for weeks can give Carrier an excuse to deny a claim.
Make it a habit to:
- Change filters regularly. A clogged filter can cause breakdowns and void warranty coverage.
- Schedule professional maintenance at least once a year. Keep all invoices as proof.
- Address trouble codes or odd noises promptly. Waiting can turn a small, covered issue into a major, uncovered repair.
- Check your system’s registration status every now and then. If in doubt, reach out to Carrier customer support and ask for a reset or re-confirmation.
Think of your warranty as a partnership: you keep the system in good shape, and Carrier’s got your back if something out of your control goes wrong.
Final Thoughts: Make the Most of Your Carrier HVAC Warranty
Honestly, dealing with warranties is never anyone’s idea of a good time. But if you take a few simple steps—register your Carrier HVAC system, keep your paperwork neat, stick to routine maintenance, and call in an authorized pro when things go sideways—you can avoid most headaches. Carrier’s warranty program is a safety net that works best when you meet them halfway.
Don’t be afraid to ask questions if something’s confusing or a claim hits a snag. Carrier support and your installer are there to help, and no issue is too small to double-check. Treat your Carrier warranty like you would a high-stakes recipe: follow the instructions, keep your ingredients (paperwork) organized, and don’t be afraid to call for help if something goes off script. That way, you’ll keep your home comfy—and your wallet healthy—for years to come.