Honestly, the process is pretty simple, but if it’s your first time, it might feel a little mysterious. Maybe you’re used to paper warranty cards or registration codes stuck to manuals that always get lost in a drawer. Registering your Whirlpool appliances via the app isn’t just about ticking a box—it opens up a bunch of perks and makes life way easier if anything ever needs troubleshooting down the road.
Why Registering Your Whirlpool Appliance Matters
Let me explain why registering isn’t just some corporate hoop you have to jump through. Think of registration as the “save game” button for your new Whirlpool kitchen gadget. Once it’s on record, you unlock all sorts of helpful stuff—not just proof of ownership, but direct access to warranty, recall notifications, and customer support that’s personalized to your appliance (no more hunting for the right model code).
Here’s the thing: if something goes wrong with your appliance, having it registered means Whirlpool can quickly find all your product details, warranty status, and past fixes. That smooths out repair calls and makes troubleshooting a breeze. You’ll also get app notifications for maintenance, firmware updates, or even the occasional energy-saving tip tailored to your registered devices. It’s honestly like having a kitchen assistant who knows exactly what’s happening with your stuff.
Skipping this step? You risk scrambling later—digging through receipts, trying to remember purchase dates, or wishing you had an easy way to prove ownership. Registering now, via the Whirlpool app, is just smart adulting.
Getting Started: What You’ll Need Before Registering
Before you grab your phone, let’s round up a quick checklist so you’re not left halfway through the process missing a step. Registering with the Whirlpool mobile app doesn’t require any technical wizardry, but you do need a few details handy.
- Your appliance’s model and serial number. You’ll usually find these on a sticker inside the door or along the edge of your appliance.
- A stable Wi-Fi connection. The app needs to communicate with Whirlpool’s servers for syncing and verification.
- Your smartphone (iOS or Android) with the Whirlpool app installed. You can grab it for free from the App Store or Google Play.
- An email address. This is needed to create or log in to your Whirlpool account, which ties everything together.
Where do you find the model and serial number? It’s often inside the door or lid—take a flashlight if needed. For refrigerators, look on the wall inside. For dishwashers, it’s usually along the side of the door. Ovens and ranges? Check the rim behind the oven door. And if you’re feeling stuck, there’s usually a diagram in the manual. Grab a notepad or, better yet, snap a photo so you can enter the codes easily in the app.
How To Download and Set Up the Whirlpool Mobile App
So, you’ve got your model and serial code, your phone’s charged, and you’re ready to roll. Downloading the Whirlpool mobile app is your next step, and it only takes a minute.
- Open the App Store (iPhone) or Google Play Store (Android).
- Search for “Whirlpool” and look for the official app with the familiar Whirlpool swoosh logo.
- Tap Download or Install and let your phone work its magic.
Once it’s ready, open the app. The first thing you’ll see is a prompt to sign in or create a Whirlpool account. If you already set up an account on their website, just use the same email and password—everything will sync automatically. If not, creating a new account is straightforward. Enter your email, create a password, and confirm your info. You might even get a verification email—open it and tap the link to activate your account.
Here’s a personal tip: if you have more than one Whirlpool appliance, you can register them all to the same account. That way, you can manage everything from one dashboard instead of hopping between different profiles.
Step-by-Step Guide: Registering Your Appliance via the App
Ready for the main event? Registering your Whirlpool kitchen appliance using the mobile app is a guided process, designed for everyday folks—not tech pros. Let’s walk through it together:
- Open the app and log in to your Whirlpool account.
- On the home screen, tap the “Add Appliance” or “Register Product” button. (It’s usually marked with a plus sign or visible in the main menu.)
- Choose your appliance type—fridge, oven, dishwasher, microwave, whatever you’re registering.
- Enter your model and serial number when prompted. Double-check these—one wrong digit can throw things off.
- The app may ask you for purchase details, like date and store. Enter this if you have it handy, but don’t stress if you can’t find the receipt—usually only the serial and model codes are mandatory.
- If your appliance is smart (Wi-Fi enabled), the app will walk you through pairing it with your home network. This lets you use extra features and receive updates. Follow the step-by-step prompts to sync your appliance—often, you’ll press a button on the appliance to enter pairing mode, and your phone will finish the setup.
- Review your details and complete the registration. The app will show you a confirmation screen, and you’ll often get a confirmation email, too.
If your appliance isn’t “smart” (meaning it doesn’t connect to Wi-Fi), you’ll still follow steps 1–5, and you can skip the pairing step.
Pro tip: If your Whirlpool remote (like the washer/dryer companion remote) needs to be paired, have fresh batteries ready and follow app prompts for syncing or resetting as needed.
Troubleshooting Common Registration Problems
You might be wondering, “What if things don’t go smoothly?” The good news: most registration hiccups are easy to fix. Here’s a quick walkthrough of some common issues and how to solve them.
- Problem: App won’t accept my model or serial number. Double-check for typos. Sometimes letters and numbers look alike (is that a 0 or an O?). If all else fails, snap a photo of the sticker and compare as you enter it.
- Problem: App can’t find or sync with my appliance. Make sure your Wi-Fi signal is strong and that your phone’s Bluetooth is turned on if the app asks for it. Some appliances need you to press and hold a specific button (check your manual or the app’s instructions) to enter “pairing” mode.
- Problem: Registration hangs or fails to submit. Try restarting the app or your phone. If you’re on spotty Wi-Fi, moving closer to your router can help. For persistent issues, uninstall and reinstall the app—it resets the connection and often solves weird glitches.
- Problem: Confirmation email never arrives. Check your spam or promotions folder. If it’s still missing, you can usually trigger a resend from within your account settings in the app.
Honestly, most problems boil down to a missed digit, outdated app version, or a brief connection hiccup. Take a breath, go step by step, and you’ll get it sorted. If you still run into trouble, Whirlpool’s support team can guide you by phone, chat, or even through the app itself.
Extra Features You Unlock After Registration
So what’s in it for you after registration, besides peace of mind? Quite a lot, actually. Whirlpool’s mobile app isn’t just an electronic rolodex of your appliances—it’s a hub packed with features.
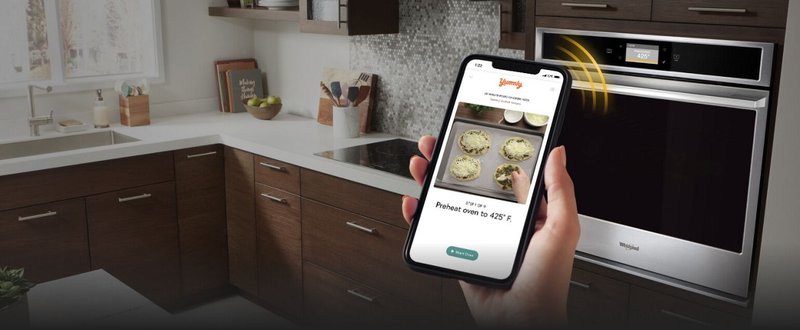
- Remote monitoring and control (for smart appliances). Preheat your oven or check fridge temps right from your phone. The app lets you operate certain functions, set timers, and even get notifications if your refrigerator door is left open.
- Easy warranty support. If your appliance needs service, you can request help with a tap, and all your warranty details are ready to go—no more rummaging for paperwork or receipt codes.
- Maintenance reminders and alerts. Receive push notifications about filter changes, cleaning cycles, or firmware updates, so your appliance runs like new.
- Troubleshooting help at your fingertips. The app has built-in troubleshooting guides, videos, and customer support contacts tailored to your exact model. No more endless Googling for the right answer.
Think of the app as your personal kitchen command center. If you ever need to reset, sync, or update your appliance, you’ll find step-by-step guides right in the app—plus logs of everything registered to your account.
Comparing: Mobile App Registration vs. Old-School Methods
You might be curious how this stacks up compared to registering your Whirlpool appliance by mail or on the website. Here’s the scoop:
- Speed: The mobile app is way faster—you can register an appliance in two or three minutes, versus filling out a card or website form.
- Convenience: Everything’s on your phone, so you can register as soon as you’ve installed the appliance—no need to save paperwork or hunt for a computer.
- Control: The app lets you manage, update, or remove appliances anytime. Lost your phone? Just sign in on another device—the info lives in your Whirlpool account, not just your phone.
- Smart integration: Only the app gives you live tools—like syncing, pairing, or resetting smart appliances—that paper forms simply can’t offer.
In short, registering via the app isn’t just a modern convenience. It’s a whole new way of staying connected with your kitchen—and being prepared, should you ever need help.
What To Do If You Need To Update or Remove an Appliance
Let’s say you remodel your kitchen, move houses, or simply upgrade to a newer Whirlpool model. How do you update or remove appliances from your app? It’s easier than you might think.
First, open the Whirlpool mobile app and log in. Tap your profile or home dashboard to see a list of your registered appliances. Find the device you want to update or remove. Tap into its details—there’s often a gear or pencil icon for editing information. Here you can change the nickname (“Main Kitchen Fridge” or “Guest Suite Oven”), update purchase dates, or even add notes about repairs.
If you’re passing the appliance to someone else, or replacing it, you can remove it from your account. There’ll usually be a “Remove” or “Delete” button in the appliance’s detail screen. Confirm, and it’s unlinked from your account—no worries about synced settings or personal info lingering around.
For smart appliances, you may also want to do a factory reset (instructions are in the app or manual) so your Wi-Fi and account info are wiped before you sell or recycle the gadget. This helps protect your privacy and ensures the next owner can pair it with their own app.
Final Thoughts: Take Control of Your Kitchen with the Whirlpool Mobile App
Honestly, registering your Whirlpool kitchen appliances with the mobile app is one of those little things that pays off big-time later. It’s like putting your appliance ownership on autopilot—no more lost receipts, missed warranty windows, or fumbling around when something needs fixing.
If you’re new to the process, just go step by step. Gather your model and serial codes, set up your Whirlpool account, and use the app’s guided tools to sync or register in minutes. And remember, if you run into trouble, you’re not alone—the app and support team are there to help every step of the way.
Now your kitchen is not just high-tech on the outside, but smart and secure on the back end, too. So grab that phone, register your gear, and enjoy the little peace of mind that comes with knowing you’re covered—whether you’re baking, blending, or just bragging about your new appliances to friends.