Imagine you just bought a fancy new gadget for your smart home — an Arlo security camera or doorbell, for example. You’re excited to get it up and running, but somewhere between unboxing and setup, a question pops into your mind: “Do I actually need to keep the receipt to register this device?” It’s like buying a concert ticket and wondering if you can get in without the stub. When it comes to Arlo smart home devices, things aren’t quite that straightforward, but understanding what the receipt means in the registration process can save you a lot of headaches.
Setting up Arlo devices usually involves syncing the hardware to an app, registering the product online, and ensuring your coverage or warranty is intact. The receipt often feels like a golden ticket — proof of purchase, warranty, or even customer service access. But is it really mandatory, or just a helpful piece of paper? Let me explain how it works, what you’ll want to have on hand, and why the receipt might matter more than you think.
What Does It Mean To Register Arlo Smart Home Devices?
Registration, in the context of Arlo products, means linking your device to your Arlo account and sometimes to the official Arlo system. It’s the digital handshake that makes sure your camera or doorbell is yours, tied to your user profile, and ready to be controlled remotely through the app. When you register, you often unlock features like firmware updates, cloud storage options, and customer support.
Think of it like adopting a pet. You don’t just bring the puppy home; you also update your records so it’s officially yours. For Arlo devices, registering confirms ownership and allows Arlo to recognize and serve your device properly.
Importantly, registration is usually done through the app or web portal, where you enter the device’s unique serial number or scan a QR code. This process typically doesn’t ask for your receipt directly. The receipt is separate—it’s your proof of purchase, which comes into play mostly for warranty claims, returns, or troubleshooting with the company.
Do You Actually Need a Receipt to Register Your Arlo Device?
Honestly, in most cases, you do not need a receipt to register your Arlo smart home devices. The registration process itself focuses on the device’s serial number and your Arlo account details. When you open the Arlo app, it guides you through pairing the device by scanning a QR code or entering its unique code. The receipt isn’t requested during this step.
However, here’s the thing: while the receipt isn’t strictly required for registration, it is crucial for warranty coverage or service requests. If something goes wrong and you need to make a warranty claim or return the device, Arlo (like many manufacturers) will probably ask for your proof of purchase. That receipt acts as a timestamp to validate whether your device is still under warranty.
In other words, you might register your device just fine without it, but when troubleshooting or support calls arise, the receipt will be your best friend. So, it’s wise to save it, even if you’re tempted to toss it out after setup.
How to Register Your Arlo Device Without a Receipt
Step 1: Prepare Your Device
Before you even think about the receipt, make sure your Arlo device is powered and ready. This usually means fully charging your wireless cameras or plugging in wired models. You’ll want a fresh battery (if applicable) and a stable Wi-Fi connection.
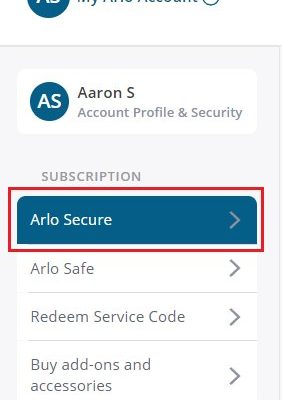
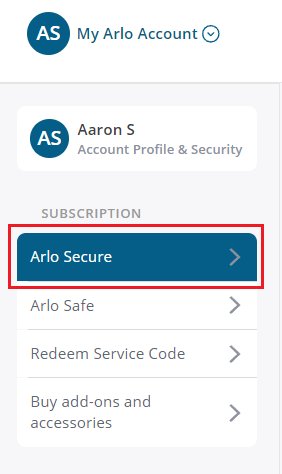
Step 2: Create or Log in to Your Arlo Account
Registration happens through the Arlo app or website. If you don’t have an account, setting one up takes just a few minutes. This is where your device will eventually live, virtually speaking.
Step 3: Enter the Serial Number or Scan the QR Code
Each Arlo device has a unique identifier, usually on the box or the device itself. You’ll scan the QR code using your phone’s camera through the app, or type in the serial number manually. This step ties the device to your account and starts syncing.
Step 4: Follow On-Screen Instructions
The app walks you through connecting the device to your home Wi-Fi network, adjusting settings, and syncing it with other Arlo devices if you have them. No receipt needed, just patience and a good internet connection.
Why Keeping Your Receipt Matters for Warranty and Support
Now, why all the fuss about the receipt if registration doesn’t require it? Let me explain. The receipt is the official proof of purchase, showing when and where you bought the Arlo device. This receipt is key for warranty claims because manufacturers typically guarantee their products for a set period—one or two years is common for smart home tech.
Imagine your camera suddenly stops syncing or won’t power on. You contact Arlo’s customer support. To confirm you’re eligible for a free repair or replacement, they’ll likely ask for your receipt. Without it, you might have to pay out of pocket or prove purchase in other complicated ways.
Even if you lose your paper receipt, many stores or online retailers can reprint or email you a copy, so asking for digital receipts at purchase can be a smart move. This habit saves a lot of aggravation down the road.
What If You Lose Your Receipt? Can You Still Get Help?
Let’s say you’re reading this while panicking because your receipt vanished in a junk drawer or got thrown away accidentally. Don’t worry—it’s not the end of the world. Many retailers and manufacturers like Arlo understand that receipts can be lost.
Here’s what you can do:
- Check your email: If you bought the device online, you probably got an order confirmation or invoice in your inbox.
- Contact the retailer: Stores often keep purchase records and can provide a copy of the receipt based on your payment method or account.
- Use your credit card statement: This can sometimes serve as partial proof, showing when and where you bought the item.
Still, keep in mind some warranty policies are strict about physical proof, so it’s always best to keep your receipt handy.
How Receipt Requirements Compare: Arlo vs. Other Brands
You might wonder how Arlo stacks up against other smart home brands in terms of registration and receipt needs. Here’s a quick look:
| Brand | Receipt Needed for Registration? | Receipt Needed for Warranty? |
|---|---|---|
| Arlo | No | Yes |
| Ring | No | Yes |
| Nest (Google) | No | Yes |
Most major brands follow the same pattern: the receipt isn’t part of device registration but is essential for warranty claims. So if you’re switching between brands or adding different devices, the takeaway is the same—save your receipt!
Tips for Managing Your Arlo Device and Receipt
Managing smart devices can get messy fast, especially when you have multiple cameras, remotes, or accessories. Here are some practical tips to keep things smooth:
- Store receipts digitally: Take photos or scan your purchase receipts and save them in a dedicated folder on your phone or cloud storage.
- Label device boxes: Write the date of purchase and serial number on the box or inside it, linking the device to its receipt.
- Keep your Arlo app updated: New app versions sometimes fix syncing and pairing issues related to registration or firmware.
- Record your device’s serial numbers: This can help with quick registration or troubleshooting without needing the physical device or box.
Wrapping It Up: Should You Keep That Receipt?
Here’s the nutshell: you don’t need a receipt to register your Arlo smart home devices. The process is all about syncing the device code with your account. But, honestly, the receipt is your safety net for warranty claims and customer support.
Think of the receipt like the warranty card you got with your laptop years ago. You might not use it right away, but when something goes wrong, you’ll be relieved you kept it. So, take a moment after that exciting unboxing to either tuck the receipt somewhere safe or save a digital copy. It’ll make your life easier if troubleshooting, syncing, or pairing issues ever come up down the road.
After all, smart home tech is supposed to simplify your life, not complicate it. Holding onto your proof of purchase helps keep things simple when it counts.