But here’s the thing: claiming a warranty for your GE kitchen appliances doesn’t have to be a maze of paperwork and endless phone calls. It’s more like putting together a simple puzzle. All you need are the right pieces—your proof of purchase, a clear head, and a bit of patience. Think of the warranty process as a secret recipe: follow the steps in order and you’ll end up with something satisfying—a working appliance, or at least a fair resolution. So, let’s walk through the process together, from figuring out what’s covered to actually getting help from GE.
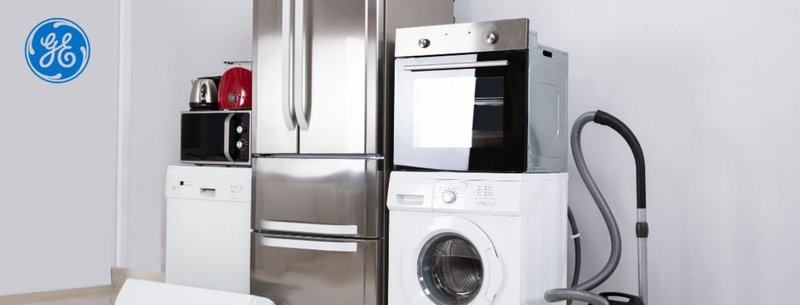
What Does a GE Appliance Warranty Actually Cover?
Before you start digging through junk drawers for old receipts, it helps to know what your GE warranty actually gets you. The coverage can feel a bit like reading the fine print on a cereal box—full of surprises and not always what you expected.
GE kitchen appliances usually come with a limited manufacturer’s warranty. This covers certain parts and labor costs if your appliance has a defect in materials or workmanship, usually for the first year after purchase. Sometimes specific parts, like a compressor in a refrigerator, may have extra coverage—sort of like a really persistent friend who just can’t let go.
- One-year limited warranty: Most GE kitchen appliances (think: dishwashers, ovens, microwaves, and fridges) will be covered for at least a year from the date you bought them. That means GE pays for repairs or replacement if the problem isn’t your fault.
- Extended or additional coverage: Sometimes, big-ticket items like certain refrigerators have extra years of coverage on stuff like sealed systems or compressors.
- What isn’t covered: Normal wear and tear, accidental damage (like dropping the remote or overloading the washer), or issues caused by improper installation or non-GE parts usually aren’t included.
Honestly, the warranty is there to protect you against those random “why did this stop working?” moments—not from you accidentally melting a spatula inside the oven because you got distracted by your phone.
Gathering What You Need: The “Warranty Claim Toolkit”
Here’s a secret: the most painful part of a warranty claim is usually getting your paperwork in order, not the actual claim. Imagine you’re putting together a tiny toolkit—every piece counts.
You’ll almost always need:
- Proof of purchase (like your receipt, order confirmation, or invoice—this is your golden ticket)
- Model and serial number (these can usually be found on a sticker inside the appliance door or along the edge—sometimes you’ll have to do a little hunting)
- Details about the issue (is the fridge not cooling, or does the microwave make odd noises? Write it down so you’re not scrambling on the phone)
- Personal information (your name, address, phone number—GE’s not sending you a fridge, but they do need to know where to send a technician or parts)
Let me explain why all this matters: GE uses these details to check if your warranty is still valid and to match you with the right support team. Don’t worry if you can’t find your receipt—a lot of people misplace them. It’s still worth contacting GE, as they might use your appliance’s serial code to look up the manufacturing date, which sometimes works as a backup plan.
How to Start Your GE Appliance Warranty Claim
So, you’ve got your “toolkit” ready—what now? Filing a warranty claim with GE is a bit like ordering takeout: there’s more than one way to do it, but some methods are faster, and all of them should get you what you need if you follow the steps.
- Online submission: For many people, the easiest way is to use the GE Appliances official website. There’s a service request form where you enter your model/serial data, problem description, and personal information. You can upload receipts if you have them.
- Phone support: If you prefer, you can call GE’s customer service number. The rep will ask about your appliance, walk you through some troubleshooting steps, and help start the claim. Be ready for a bit of hold music—it happens.
- Email or live chat: Some issues can be started via email or live chat on the GE Appliances website, which is handy if you don’t love phones. Response times vary, but it’s a good option if you want everything in writing.
You might be wondering: should you try fixing it yourself before filing a claim? While resetting, syncing, or troubleshooting simple things (like checking if it’s plugged in or doing a quick battery swap on the remote) is always smart, don’t take apart anything complicated. Opening panels or tampering with internal parts can void your warranty faster than you can say “user error.”
What Happens After You File: The “GE Warranty Process” Timeline
Filing your claim is just the beginning. Once you’ve shared your details, GE’s system will kick into gear. Here’s what usually happens next:
- Initial troubleshooting: GE might email or call to walk you through basic troubleshooting steps—like resetting your oven, code checks for error displays, or pairing a remote if it’s a microwave or fancy fridge. Sometimes, it’s something simple and you’ll feel like a superhero for fixing it yourself.
- Scheduling service: If the problem needs a technician, GE will set up an appointment. Many repairs are done in your home, so clear a path for the repair tech and maybe wrangle any pets who love to help.
- Parts replacement: Occasionally, GE might just mail you a part—like a new remote or a replacement battery cartridge—if the fix is easy and non-technical.
- Follow-up: After repair or replacement, GE may follow up to make sure everything’s working. If not, you may need a second visit or additional troubleshooting.
The best advice? Stay patient and keep all emails or paperwork related to the claim. It’s handy to have a paper trail if you need to reference anything later.
Common Problems and How to Troubleshoot Before Claiming
You know that feeling when your appliance acts up, and you’re torn between panic and “maybe it’s just a weird glitch?” Before you file a warranty claim, take a few minutes to run through some basic checks.
- Power and reset: Is the appliance plugged in? Has a breaker tripped? Sometimes a simple reset (unplug for 30 seconds, then plug back in) works wonders. It’s basically the “turn it off and on again” of the kitchen world.
- Remote or control panel: If you have a remote or digital display, check the batteries and look for error codes. Sometimes you need to sync or pair the remote again (the manual usually tells you how). If the code won’t clear, jot it down for the support team.
- Noises or leaks: Sudden sounds or leaks sometimes mean a filter needs cleaning or a door isn’t sealing right. Try the easy stuff first—like checking for obstructions or gently cleaning around seals.
If all else fails, don’t stress. Reporting what you’ve already tried can speed up your claim—GE loves a prepared customer!
Tips for a Smooth Warranty Experience With GE
Let’s be honest: nobody wakes up wanting to deal with appliance warranties. But a little preparation can make your experience way less stressful (and maybe even a tad satisfying).
- Be detailed and honest: When describing your problem, more details are always better. Instead of “fridge stopped working,” try “fridge isn’t cooling, freezer’s fine, light turns on, makes a clicking noise.” The more specific you are, the less back-and-forth you’ll need.
- Organize your documents: Keep receipts, serial numbers, and previous repair notes in one spot. Snap phone photos if you’re worried about losing paper receipts.
- Follow instructions: If GE books a technician, follow their pre-visit checklist. Clear a work area and double-check the appointment time to avoid unnecessary delays.
- Be polite but persistent: CS reps are more helpful if you’re friendly but firm. If an issue drags out, politely ask for escalation or a supervisor.
Every claim process has the occasional hiccup. If things hit a wall, remember that many credit cards or extended warranty plans may back you up as a Plan B. Sometimes just mentioning you have these options can get things moving.
Comparing GE’s Warranty Support With Other Options
You might be wondering how GE’s warranty process stacks up against alternatives. Here’s a quick rundown—just so you know what you’re working with.
- GE brand warranty: Specialized for GE appliances. Direct access to certified technicians, official replacement parts, and repairs covered under the original terms. Downside? Sometimes slower wait times than smaller brands, since GE is such a big player.
- Universal or third-party extended warranties: These cover multiple brands or appliances. They can offer broader coverage (multiple devices under one plan) and sometimes faster response. However, you may end up with generic parts or non-GE techs—and not all issues will be covered.
- DIY or out-of-pocket repair: No coverage, but you’re in total control. For minor fixes (like replacing a fridge lightbulb or swapping a remote’s battery), this can be quicker. But for anything big, it gets pricey fast and can void your GE warranty.
Honestly, using the official GE Appliances warranty is usually the best bet while your device is covered, especially for tough issues that need special parts, code resets, or professional troubleshooting.
What to Expect If Your Claim Is Denied
Sometimes, despite your best efforts, a warranty claim might get rejected. It’s frustrating—like cooking a fancy meal, only to burn it right at the end. But there are still things you can do.
Common reasons GE may deny a claim:
- The problem isn’t covered by warranty terms (e.g., accidental damage, power surges, installation mistakes).
- The appliance is too old or out of its coverage window.
- You can’t provide proof of purchase and GE can’t verify the warranty period from your serial number.
- The appliance was already repaired by a non-certified technician, which voids the coverage.
If this happens, don’t give up right away. Ask GE to clarify the reason for denial in writing. Sometimes, having a copy of your receipt or a timeline of the issue can change their decision. If not, consider other options—like third-party repair, home warranty plans, or (if you’re handy) trying safe DIY solutions for smaller issues, especially things like remote or battery swaps.
Finishing Up: Make Your GE Warranty Work For You
Claiming a warranty for your GE kitchen appliances isn’t always the smoothest ride, but it’s definitely worth the effort. Think of it like following a recipe: gather your ingredients (documents), follow each step deliberately, and don’t forget that little bit of patience as it “cooks.” Whether you’re dealing with a beeping microwave, a temperamental fridge, or a remote that just won’t sync, knowing your rights—and how to use them—can save you money, time, and a whole lot of stress.
In the end, a good warranty is like a safety net in the kitchen jungle. With a little prep and a clear head, you’ll swing through the process and get your GE appliances back up and running. Here’s to fewer headaches—and many more hassle-free meals.