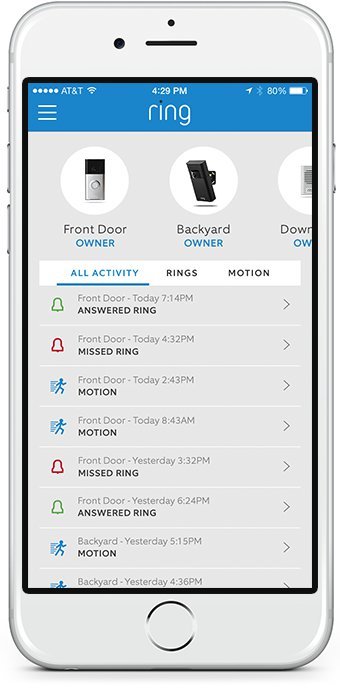
Honestly, you’re not alone if you’re staring at your phone and the box thinking, “Do I need a code? Do I have to sync each piece? What if I mess something up?” Here’s the thing: Ring made the process smoother than it looks. Registering your Ring security system—whether it’s a doorbell, camera, or the full “alarm remote” kit—just involves working with the mobile app. The trick is knowing the exact steps and what all those blinking lights and chimes really mean.
So, let’s break it all down—step by step, in plain English—so you can register your Ring security system via mobile app without second-guessing yourself (or having to reset everything five times). This guide isn’t just for techies; it’s for regular folks who want their homes safe and their setups headache-free.
Why Registering Your Ring Security System Matters
You might be wondering, “Can’t I just stick my cameras and sensors up, turn them on, and be done?” It’d be nice if home security were that simple, but here’s the real deal: registering your Ring security system through the mobile app is what actually connects everything together. Without registration, your devices are just blinking paperweights.
Registration does a few essential things:
- Pairs your devices to your unique Ring account, so nobody else can control or snoop on your cameras or alarms.
- Activates live monitoring and alerts—you won’t get those handy push notifications unless your system is linked to the app.
- Lets you control everything remotely, whether you’re upstairs or on a trip across the world.
Imagine registration as the code that unlocks your Ring system’s “brain.” Without it, your system can’t sync, update, or even reset properly. Plus, you’ll need to register if you ever want to pair new remotes, add battery-powered sensors, or start troubleshooting if something goes wonky.
Getting Ready: What You Need Before Registering
Let me explain why setup starts way before you tap anything in the app. Think of it like prepping ingredients before you cook—you want everything ready so you’re not running back and forth.
Here’s what you’ll want on hand:
- Your Ring devices (doorbell, camera, motion sensors, keypad, etc.)—unboxed and batteries charged (if applicable).
- Your mobile phone or tablet with the latest Ring app installed (check your app store for updates!).
- Stable Wi-Fi—seriously, a spotty connection can make the process frustrating. Preferably do this close to your router.
- Your Ring account login information, or be ready to create one in the app.
Got a paper manual or QR code card in your box? Don’t toss it yet! Some Ring models use QR codes to sync or pair with your app, making the whole process faster and less prone to errors. And if your remote or battery device refuses to wake up later, you’ll want those instructions handy for quick troubleshooting.
Step-by-Step: How To Register Your Ring Security Systems Via Mobile App
All right, here’s where the rubber meets the road—or, more accurately, the mobile app meets your new security gear. I’ll walk you through this slowly, so nothing gets missed.
- Open the Ring mobile app on your device. If you’re new, tap “Create Account” and follow the prompts. Returning users can just sign in.
- Tap the “Set Up a Device” button. This usually looks like a big plus (+) sign on the home screen.
- Select your device type. Ring sorts its products into categories (Doorbells, Cameras, Alarm, Accessories, etc.). Choose the one that matches your kit.
- Scan the QR code or enter the setup code. Most Ring devices have a sticker with a QR code or a five-digit code you’ll need to enter. The app will guide you—just follow the on-screen steps and line up that code with your camera.
- Plug in or power on your device. If you’re adding a camera or motion sensor, pop in the battery or plug it in. Look for a blinking light or the familiar Ring chime—it usually means the device is in pairing mode.
- Connect to your Wi-Fi. The app will ask for your home Wi-Fi details. Enter them carefully. If the device can’t sync, it might be because of a weak signal or a typo in your password.
- Finish the in-app prompts. Give your device a name (like “Front Porch Camera”), choose settings, and let the app finish the registration process. You’ll see a confirmation screen when it’s done.
- Test your setup! Trigger an alert, watch a live camera stream, or arm your alarm system to make sure everything’s working.
Pro tip: If registration seems stuck, try moving closer to your router, or unplug and reset the device by holding the setup button for 10 seconds. Sometimes a fresh battery does wonders!
Understanding Codes, Pairing, and Syncing in the Ring App
This is where new users get tripped up: what’s the difference between a setup code, pairing, and syncing? It all feels a little techy, but let’s untangle it.
The setup code—either a QR sticker or a five-digit code—is basically the device’s “name tag.” You scan or enter this so your app knows exactly which Ring device you’re adding. No code, no registration—it’s the secret handshake between your remote device and the app.
Pairing happens right after you enter that code. Your app reaches out to the device (using Wi-Fi or Bluetooth) and says, “Hey, are you there?” If the lights blink or the chime goes off, they’ve found each other. This is when your sensor, battery camera, or keypad actually joins your home security network.
Syncing is the final handshake—your device updates its info, gets the latest software, and makes sure it’s showing up correctly in your app. Sometimes, syncing takes a minute or two. Don’t panic if nothing happens instantly! Let the app finish up, and only try to reset the device if you get a clear error message.
Common Problems When Registering Your Ring System (And How To Fix Them)
Honestly, even the best tech can have its moody moments. If your Ring security system refuses to register, don’t throw it out the window just yet. Most issues have simple fixes.
Here’s what I see most often:
- No lights or chime after pressing the setup button? Double-check that the battery is correctly installed (and has juice). Some Ring devices ship with a tab you need to pull out of the battery slot first.
- Can’t scan the QR code? It happens! Clean your phone’s camera lens or enter the setup code manually (it’s usually printed right next to the QR code).
- Failed Wi-Fi connection? Move closer to your router, or check if your phone is on a different Wi-Fi band (like 5GHz instead of 2.4GHz). Some Ring devices only like 2.4GHz.
- App says “Device already registered”? If you bought it secondhand, the old owner might need to remove it from their account. Reach out to Ring support for help—they deal with this all the time.
“Most Ring registration issues are about batteries, Wi-Fi, or code entry mistakes—so double-check the little stuff first. It usually saves you a support call.”
How Registration Differs With Various Ring Products
You might be surprised: not all Ring products register exactly the same way. The mobile app process is similar, but there are minor quirks with doorbells, cameras, alarm kits, or remote accessories.
- Video Doorbells and Cameras: Usually require you to scan a visible QR code and connect to Wi-Fi. Expect a chime or blinking light to let you know they’re ready.
- Alarm Systems: Involve pairing the base station first, then each remote sensor, keypad, or motion detector one at a time. You’ll need to insert batteries and sometimes tap the setup button on the back of each device.
- Ring Accessories (like Chimes or Panic Remotes): These are often paired by plugging them in and holding the setup button until the app finds them. They usually don’t need Wi-Fi if they connect to your Ring base station.
If you’re adding multiple devices or an alarm kit, do one at a time. Trying to sync everything in a frenzy just creates confusion—the app can only pair so many things before it gets overwhelmed, trust me.
Pairing Additional Devices or Remotes Later On
Here’s something a lot of people forget: you don’t have to add every Ring device the first day you set up your system. If you get new remotes, sensors, or cameras later, registration via the mobile app is just as easy.
The steps are almost identical:
- Open the app, tap the plus (+), and select your new device.
- Scan the QR code, power it on, and let the app walk you through pairing and syncing.
- Name each device something helpful—”Garage Motion Sensor” is a lot better than “Sensor 2.”
And if you ever need to reset a device (maybe it lost power or isn’t syncing), there’s usually a tiny button or pinhole you press and hold for 10–15 seconds. Afterward, repeat the registration steps to bring it back into your Ring universe.
Comparing Ring Registration With Other Security Systems
Ever wonder why people love the Ring app compared to some other security brands? Here’s one thing I’ve noticed: the registration and sync process is, for the most part, simpler and less finicky. With some other systems, you’re stuck entering long codes, connecting through a web browser, and rebooting things three times before they work.
Ring’s app-based registration is designed for regular people—not IT pros. If you ever used a universal or generic security app, you might remember how confusing the pairing steps were. Ring sticks to QR codes, simple prompts, and mostly avoids tech jargon you need a dictionary for.
“Registering your Ring system via mobile app might look intimidating, but it beats fiddling with a web portal or calling in a technician just to add a new remote or battery.”
When To Contact Support (And What To Expect)
Even with guides like this, sometimes you hit a wall. Maybe your Ring app keeps getting stuck at the registration step, or the remote absolutely refuses to sync or pair. That’s when Ring’s customer support kicks in.
Here’s what I’ve found helpful when reaching out:
- Have your device model, serial number, and setup code handy (they’ll ask for these).
- Explain exactly where the process stops. “The app freezes after code entry” is more helpful than “It just doesn’t work.”
- If you bought a used device, say so—they can help unlock or transfer ownership so registration succeeds.
Ring support is usually quick via app chat or phone. Most issues get fixed right away, especially battery, Wi-Fi, or account-related problems. And if you ever need to swap a faulty device, having it registered makes warranty work way faster.
Final Thoughts: Enjoy Your Fully Registered, Connected Ring Security System
Registering your Ring security system via the mobile app might seem daunting at first, but once you know the steps, it’s almost satisfying. There’s something rewarding about seeing that “Device Added” message pop up, knowing you just set up a smart layer of protection for your home—all from your phone.
Take your time, follow the prompts in the app, and don’t stress if you hit a snag. Most hiccups are solved with a battery check, a code re-entry, or a Wi-Fi nudge. And the cool part? Once your Ring system is registered and synced, you can control everything from anywhere—no more worrying about whether you locked the door or if your camera’s battery is dead.
So grab your devices, open the app, and dive in. Your security setup is about to get a whole lot smarter—and a lot less stressful.
