Let’s be honest—life gets busy. Between pairing your new equipment, syncing up the Vivint app, and maybe even resetting a device or two, tracking a warranty might seem like the last thing on your mind. But imagine something goes wrong—maybe the battery on your Smart Lock starts fizzling out, or you run into a code issue with your touchscreen remote panel. Suddenly, knowing exactly what’s covered (and how to actually make use of that coverage) can save you a ton of time, money, and hassle.
Vivint has made some parts of this process smooth, but finding the actual steps to track your warranty can feel like searching for a hidden menu in your favorite app. That’s why we’re breaking it all down, step by step, so you can keep your security system protected without the guesswork.
Why Tracking Your Vivint Warranty Matters So Much
Here’s the thing: warranties are kind of like a safety net for your home security setup. You hope you’ll never need them, but if something fails—whether it’s a door sensor that loses sync, a battery that drains too quickly, or a remote panel that suddenly won’t code properly—you’ll be glad you paid attention.
Vivint systems, like any piece of tech, aren’t immune to the occasional hiccup. Sometimes, a component needs to be reset or re-paired, or you might run into signal issues that require troubleshooting. If your warranty is still valid, Vivint may cover repairs, replacements, or even send a tech out at no extra charge. But if you can’t prove your coverage, you could end up footing the bill yourself.
Tracking your Vivint warranty also gives you peace of mind. You’ll know exactly when your coverage starts, when it ends, and what’s included. No more digging through email chains or searching for registration codes when something goes wrong. Everything’s organized, which makes future troubleshooting a whole lot less stressful.
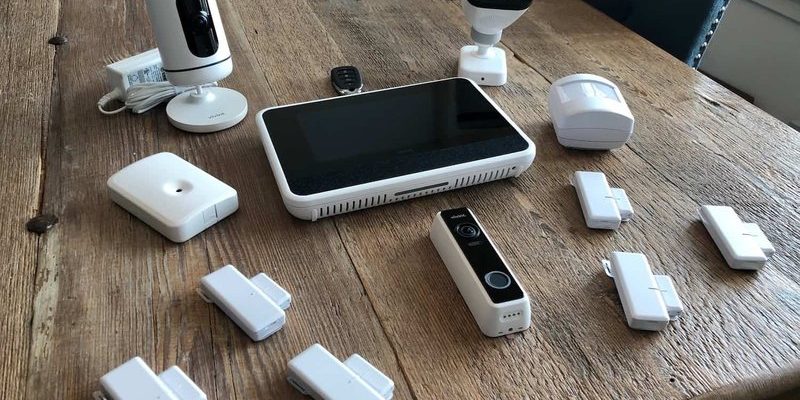
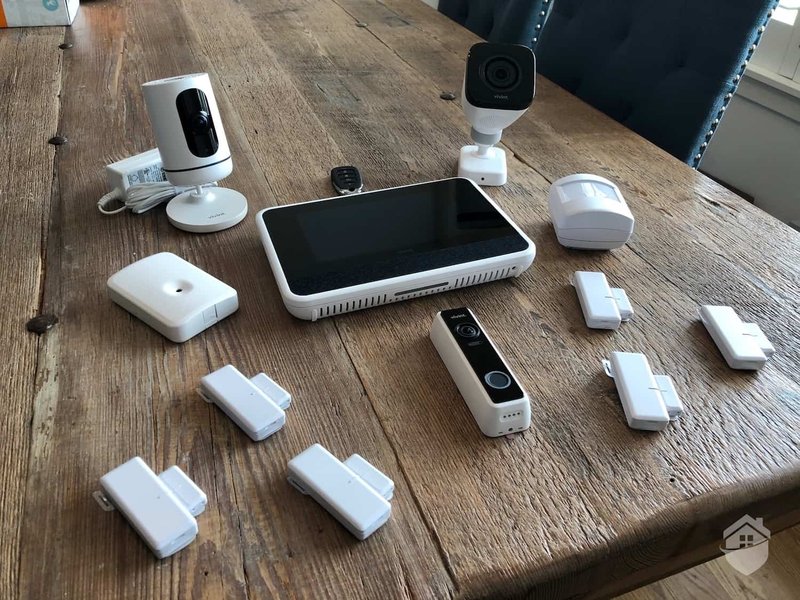
For homeowners who’ve invested in a full Vivint system—think motion sensors, video doorbells, smart locks, the works—knowing your warranty details can seriously reduce headaches when something malfunctions. Think of it as a roadmap: you’ll always know where you stand if you ever need help.
Understanding Your Vivint Security System Warranty
Let me explain how Vivint’s warranty generally works, because it isn’t always obvious at first glance. When you register your Vivint security system—either online, by phone, or via your installer—you kick off your warranty period. This is usually a set number of years (often two to five, depending on your plan or any promotions), covering defects in both the equipment and the installation.
Vivint offers different coverage levels depending on your contract. The most common is the “Service Plan Warranty,” which typically takes care of things like code failures, battery malfunctions, syncing problems, or remote issues—all those hiccups you’re likely to face. However, accidental damage, normal wear-and-tear, or user-caused issues (for example, if you attempt a risky DIY reset and make things worse) usually aren’t covered.
Here’s a general idea of what might be included:
- Repairs for hardware that fails under normal use
- Replacement for devices that can’t be fixed (like a faulty panel or battery)
- Professional troubleshooting by Vivint support team
- Parts and labor for covered repairs
Understanding these details helps you avoid surprises. Imagine pressing your remote panel and getting no response—if you know your warranty is active, you can call Vivint and get the help you need without dreading a big invoice. That’s why tracking your coverage details is just as important as understanding what the warranty includes.
How To Register and Access Your Vivint Warranty
After you’ve installed your Vivint system and everything’s paired up (think sensors connected, main panel synced, remotes working), the next step is the registration process. It’s a bit like creating a user profile for a new gadget—if you skip it, you’ll miss out on lots of helpful features, including warranty support.
Here’s how you typically register your Vivint warranty:
- During installation: Your Vivint technician often registers your equipment for you and will give you copies of your warranty documents—either printed or via email.
- Online: You can go to the Vivint website, sign in with your account, and enter your product details, like serial numbers, purchase date, and a few quick codes found on your system’s paperwork.
- By phone: You can always call Vivint support to confirm your registration and have them walk you through any missing steps—perfect if you’re not tech-savvy or just want an extra layer of reassurance.
Once you’re registered, you should receive a confirmation—usually by email—summarizing your warranty dates, what’s covered, and how to access support. Honestly, I’d recommend saving this email and even printing it out for easy reference. If your system ever needs a reset, repair, or replacement, you’ll have all the info you need at your fingertips.
Step-By-Step: How To Check Your Vivint Warranty Details Online
You might be wondering, “So how do I actually check my Vivint warranty, now that everything’s registered?” Here’s where Vivint makes things fairly straightforward—if you know where to look.
Step 1: Log in to your Vivint account. Go to the Vivint website (or use the app), tap the Menu, and select My Account.
Step 2: Navigate to ‘Equipment’ or ‘Warranty’ tabs. Not every account dashboard looks the same, but you’ll typically see a section listing your registered devices—door sensors, smart locks, remote panels, and more. There should be a ‘Warranty’ or ‘Coverage’ link next to each device.
Step 3: Review your warranty details. This will show:
- Start and end dates for each device’s coverage
- Serial numbers or codes tied to your account
- Instructions for what to do next if you need troubleshooting or a replacement
Step 4: Download or print your warranty status. If you’re the type who likes paper backups (honestly, it’s never a bad idea!), you can save or print a summary for future reference. That way, if you ever replace a battery, reset your system, or need to code a new remote, you know exactly what’s still covered.
If you get stuck in any of these steps—say, you can’t find your device info or nothing appears under your registered products—Vivint’s customer support is usually quick to help. Just call them up or use the app’s chat feature.
What To Do If Your Vivint Warranty Doesn’t Show Up
Let’s say you’ve followed all the steps, but for some reason, your warranty details don’t display on your Vivint account. Frustrating? Totally. But don’t panic—there are a few reasons this might happen, and usually, they’re easy to fix.
Common reasons your Vivint warranty isn’t visible:
- Your system wasn’t registered correctly. Maybe a serial code was entered wrong, or the registration wasn’t submitted after setup.
- You’re looking at the wrong Vivint account. (This happens if you’ve moved homes, or an installer created the account with a different email address.)
- There’s a delay in the Vivint system syncing your new equipment registration—which sometimes takes a day or two if there was recent maintenance.
Here’s what to do:
- Double-check your original registration email for typos or missing codes.
- Confirm you’re logged into the correct Vivint account (the one linked to your current property address).
- Contact Vivint support and explain the issue—they can manually confirm your registration and warranty, or help you reset your account details.
Most of the time, a quick call or chat resolves things. If you ever need to pair a new remote, code a replacement sensor, or troubleshoot a syncing issue, having your warranty sorted means less stress and faster help.
Tips For Keeping Your Vivint Warranty Information Organized
Honestly, the hardest part of dealing with warranties is keeping all the information organized. You can avoid a ton of stress by making it a habit to store your Vivint details in a way that’s easy to find.
If Murphy’s Law holds true—anything that can go wrong, will go wrong—it’s usually when you’re in a hurry or away from home. Be proactive and stash your warranty info somewhere safe.
Here’s what I suggest:
- Save your Vivint registration email in a special folder in your inbox (call it “Home Security” or “Warranties” for easy searching).
- Print a physical copy of your warranty and tape it inside a kitchen cabinet—near your user manuals, reset instructions, and troubleshooting tips.
- Add key dates (like “Warranty Expires”) to your phone’s calendar, and set a reminder a month before it lapses—just in case you need to schedule a repair or battery replacement before coverage ends.
- If your system includes multiple devices (panels, remotes, cameras, etc.), keep a list of serial numbers and warranty dates, so you know what’s protected and what’s not.
Staying organized isn’t just for neat freaks. If your door sensor starts draining batteries fast or your remote repeatedly loses sync, you’ll thank yourself for having everything on hand.
When—and How—To Use Your Vivint Warranty For Service
So, what happens when your Vivint system does act up? Maybe you’ve tried a quick reset or some basic troubleshooting, but the problem won’t go away. Here’s how your warranty comes into play.
First, check your warranty status using those steps we discussed earlier. If you’re within the coverage window, you can contact Vivint support and explain what’s happening. They’ll probably walk you through a few more troubleshooting steps—like re-pairing a device, updating software, or replacing a battery.
If that doesn’t work, and they confirm the issue is covered, Vivint will either ship out a replacement part, schedule a technician visit, or sometimes even do a remote code reset if it’s a software problem. The best part? If your warranty applies, you won’t pay out-of-pocket.
Here’s a tiny real-world example: imagine your Smart Hub panel stops syncing with your door sensors, and nothing fixes it. Instead of worrying about the repair cost, you tap into your Vivint warranty and get a new panel shipped out. That’s peace of mind in action.
Remember, if you ever try fixing things yourself—like cracking open a sensor or forcing a reset—check with Vivint first, so you don’t accidentally void your coverage.
Comparing Vivint’s Warranty Tracking to Other Brands
If you’re curious how Vivint stacks up against other security system brands, you’re not alone. Some companies make warranty tracking simple, with universal processes for every customer. Others… not so much.
Vivint’s process is fairly streamlined: once you’re registered, most information is available online or in the app. That beats digging for old receipts or calling a generic support number for universal-brand systems, where you might need to hunt down third-party coverage codes or fill out long forms.
However, some competitors (like ADT or SimpliSafe) may offer simpler “no registration required” plans, or automatic warranty status checks by just entering your device serial. The downside? Those plans can be stricter about what’s covered and how batteries, remotes, or hardware resets are handled.
Vivint’s approach offers a good balance. You get clear, device-specific coverage with easy online access, but you do need to stay on top of the registration process. Honestly, if you keep your documents and account info organized, you’ll find Vivint’s tracking system refreshingly transparent.
Final Thoughts: Stay Covered and Stay Confident
Tracking your Vivint security system warranty after registration isn’t exactly thrilling, but it’s the secret sauce that keeps your home protected for the long haul. Once you’ve set up your system, synced the devices, and registered everything with Vivint, just take a few extra minutes to check and organize your coverage details.
Losing your warranty info or letting it slip through the cracks can mean extra costs and headaches down the road—especially if you run into a code or battery issue and need real help. But with a little planning (and maybe a sticky note or two), you’ll always know where you stand.
So go ahead—register, log in, double-check your coverage, and keep that peace of mind tucked safely away. Next time your system needs troubleshooting, you’ll be two steps ahead, and your future self will thank you.