Imagine registering your GE oven or range like setting up a brand-new phone or syncing a remote control. You want that connection to be precise and correct, so everything “syncs” perfectly. Whether you’re tech-savvy or not, knowing exactly what details to have on hand makes the whole process painless. Let me explain what you need, why it matters, and how it helps you get the most out of your GE appliance.
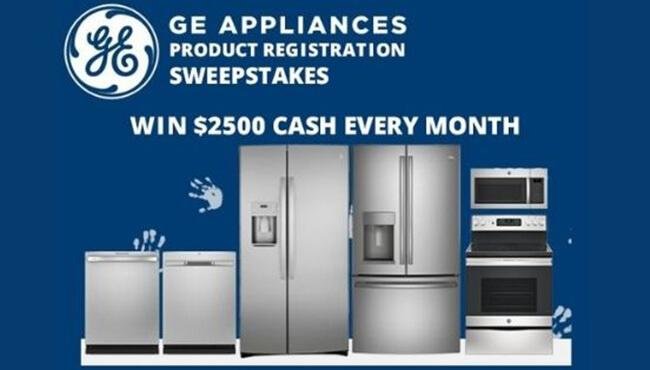
Why Registering Your GE Oven or Range Matters
Honestly, some people skip registering their appliances because it seems like an extra chore. But here’s the thing: registration comes with perks that can save you headaches later. For one, it activates your warranty, which protects you against defects or malfunctions. Without registration, you might find yourself out of luck if something goes wrong.
Registration also means GE can contact you with important info—like safety recalls, software updates, or troubleshooting tips. Think of it like pairing your appliance with the company’s support system. If you ever need help, having your oven or range registered speeds up the process, because they’ll already have your model and purchase info handy.
Plus, some extended warranty offers or promotions only apply if you register your product within a certain timeframe after purchase. So it really pays off to get the right info ready and complete the registration early.
Essential Information You’ll Need To Register Your GE Oven & Range
Getting your GE oven or range registered is all about accuracy. You’ll want to have the following details ready before you start:
- Model Number: This identifies the exact oven or range you own. It’s usually found on a label inside the door frame or on the back of the appliance.
- Serial Number: Like a fingerprint, this unique number tells GE which specific unit you purchased. It’s also located near the model number label.
- Purchase Date: The date you bought your appliance is crucial for warranty purposes. Keep your receipt handy or check your online order confirmation.
- Retailer Information: Knowing where you bought your GE oven or range helps confirm purchase authenticity and may be required for some promotions.
- Personal Contact Info: Your name, address, phone number, and email allow GE to reach you if needed.
Think of the model and serial numbers like the code you enter to “sync” your oven with GE’s system—if you get them wrong, things won’t connect properly. Having your receipt is like keeping a receipt for your phone’s warranty—it proves ownership and purchase date.
Finding the Model and Serial Numbers on Your GE Oven or Range
You might be wondering where exactly to find these crucial numbers. Don’t worry—GE makes them pretty accessible, but the location can vary by model.
Typically, the model number and serial number are on a metal plate or sticker that’s:
- Inside the oven door frame, visible when you open the door
- On the back or side panel of the range
- Sometimes on the inside edge of the drawer below the oven
If you’ve got a double oven or a fancy slide-in style, the label might be a bit hidden, but it’s there. If you’re struggling to spot it, grab a flashlight and look carefully inside the oven door frame or check the user manual for a specific location.
Here’s a little pro tip: take a clear photo of these labels when you find them. It makes registration faster, and it’s handy for troubleshooting or warranty claims later on.
How to Use Your Purchase Receipt to Support Your Registration
Your purchase receipt isn’t just a piece of paper—it’s proof you actually bought the GE oven or range. This document confirms *when* and *where* the purchase happened, which can matter big time for warranty coverage.
When registering, you’ll often be asked to enter the purchase date exactly as it appears on the receipt. That means if you bought your GE oven on March 15th, 2024, you want to avoid guessing or rounding off that number. Trust me, getting the date right keeps your warranty from getting tangled up.
Make sure your receipt includes:
- Store or website name
- Date of purchase
- Product description (to verify it’s the right item)
- Price paid (sometimes required for extended warranty offers)
If you lost your physical receipt but bought online, check your email for the order confirmation—it usually works just as well. And if you paid with a credit card, your bank statement can help confirm the date.
Personal Information: What GE Needs and Why
You might hesitate when asked for your address or phone number, but this info is super important. Let me explain: GE needs your contact details so they can:
- Send you updates about your appliance
- Reach you quickly if there’s a safety recall or urgent notice
- Help you with troubleshooting, warranty claims, or service appointments
When you register, you’ll want to provide your full name, mailing address, phone number, and email. Honestly, the email is usually the best way to get quick communications.
Privacy worries? GE keeps this info confidential and uses it solely for service-related purposes. You’re not signing up for marketing spam—just support and product care.
Registering Online vs. By Phone: Which Method Works Best?
Wondering how you actually hand over all this info to GE? You have options, depending on what’s easiest for you.
- Online Registration: This is the quickest way. GE’s website has a dedicated registration page where you enter your model number, serial number, purchase date, and contact info. The form walks you through step-by-step, almost like syncing your appliance to your account.
- Phone Registration: If you’d rather talk to a person, calling GE’s customer service lets you provide info verbally. This can be helpful if you’re not comfortable online or have questions during the process.
One neat benefit of online registration is immediate confirmation—no waiting on hold or paperwork. Plus, the system can catch errors like invalid serial numbers, so you don’t accidentally enter bad info.
On the other hand, if you’re dealing with an older model or have special circumstances, phone support gives you a human touch and troubleshooting help right away.
Common Issues During Registration and How to Avoid Them
Let’s be real—registering your GE oven or range isn’t always smooth sailing. Here are some hiccups you might run into and how to dodge them:
- Entering Incorrect Model or Serial Numbers: These are often long codes with letters and numbers mixed together. Copy them exactly as they appear on the label. A single wrong letter can throw off the system.
- Lost or Misplaced Purchase Receipt: If you don’t have your receipt, try to find an order confirmation email or bank statement as proof. If you can’t, GE customer service might help verify your purchase another way.
- Website Reset or Timeout Issues: If you’re filling out the online form and it resets or times out, try using a different browser or device. Also, keep your info handy so you don’t lose progress.
- Unrecognized Model Numbers: Sometimes very new or very old models aren’t in the registration database yet. If that happens, call GE support to manually register your appliance.
Here’s the thing—being patient and double-checking all your info before submitting makes the whole process much easier. If you do run into trouble, GE’s customer support team is usually just a call away to help troubleshoot or reset your registration.
Wrapping It Up: Why Taking Time to Register Is Worth It
Registering your GE oven or range isn’t just busywork—it’s like creating a safety net for your new kitchen companion. Having the right info—like your model number, serial number, purchase date, and contact details—makes the process smooth and hassle-free. It unlocks warranty protection, helps GE keep you informed, and speeds up any future service.
You might be tempted to skip this step, but honestly, it’s one of the easiest ways to protect your investment and keep your cooking routine stress-free. So, next time you unbox your GE oven or range, think of registration as the first “recipe” to follow—and gather your info carefully to set yourself up for success.