Think of appliance registration like putting your name on your lunch in the office fridge. If anything goes wrong, or you need help (maybe you lose a part, need a code for troubleshooting, or even have to reset or pair your device with a smart remote), Samsung knows who you are and what you own. Registering might sound like boring paperwork, but honestly, it’s a smart move that can save you headaches down the road. If you’re not sure what info you need, don’t worry—I’ll walk you through it, step by step, just like explaining a recipe to a friend over coffee.
Why Register Your Samsung Kitchen Appliances?
Registering your Samsung kitchen appliance isn’t just about collecting another email for Samsung’s database. There’s actually a real, practical reason behind it. When you register, you’re officially linking your ownership of that fridge, oven, dishwasher, or microwave to YOUR name and address. This isn’t just for warranty stuff (though that’s a big part of it), but also for faster support, helpful troubleshooting, and access to updates—like software codes and sync or pairing information for smart appliances.
Let’s say your fridge starts making a weird noise or your smart oven won’t connect to Wi-Fi. If Samsung already has your info, you get priority help and can skip the line with customer service. Plus, if there’s a recall or safety notice, they’ll actually know how to reach you. It’s like having your appliance’s birth certificate ready to go, instead of scrambling for the receipt years later.
Many people don’t realize that not registering can actually slow down battery replacements, remote syncing, or even basic code requests when something breaks. So, honestly, it’s not about giving away your info—it’s about protecting your investment and making your life easier when (not if) something goes wrong.
What Information Do You Need to Register?
Here’s the thing: Samsung’s appliance registration isn’t complex, but the system wants a few specific details. Imagine you’re filling out a new contact in your phone—you need the essentials so you don’t forget who’s who. For most Samsung kitchen appliances, you’ll want to have:
- Model Number: This is usually a combination of letters and numbers, unique to your appliance. You’ll find it on a silver sticker inside the door, behind the lower panel, or sometimes on the back. It’s like your appliance’s “first name.”
- Serial Number: Another unique code, separate from the model number. This is how Samsung tracks YOUR individual unit in case of warranty, troubleshooting, reset, or pairing issues.
- Date of Purchase: When did you buy it? You’ll need the date, so keep that receipt handy if you can.
- Place of Purchase: Was it Best Buy, Home Depot, or straight from Samsung’s website? Samsung may ask for the store name or website.
- Your Contact Details: This includes your name, address, phone number, and email. If there’s a recall or update, they need to reach you.
- Proof of Purchase (sometimes): For some high-value products, especially smart or connected devices, Samsung may ask you to upload a digital copy or photo of your receipt.
I know, it might sound like a lot, but most of this is on the box, your digital receipt, or a quick photo away. Setting aside ten minutes now can seriously pay off later.
Where to Find Your Model and Serial Numbers
You might be thinking, “Great, I need all these codes—but where the heck are they?” Each appliance tends to hide these numbers in its own little spot, almost like a scavenger hunt (without the fun). Here’s how you can track them down:
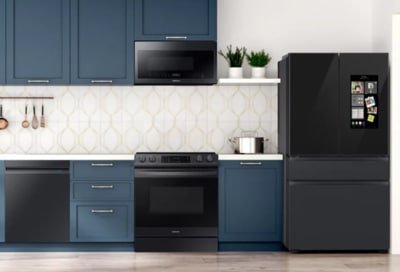
- Refrigerators: Check inside the fridge, usually on a sticker near the crisper drawers, on the side wall, or behind a lower kickplate.
- Ovens and Ranges: Open the oven door and look along the frame, or sometimes behind the bottom drawer.
- Dishwashers: The sticker will be inside the door, either on the side or the top edge.
- Microwaves: Open the microwave door, and check the edge or the inside wall near the hinge.
Let me explain—Samsung’s info tags usually include both the model and serial number in one place. The model is often on top, and the serial number is under it (sometimes labeled “S/N”). Take a clear photo with your phone for easy copying.
If you struggle to find them, try searching “[your appliance] model and serial number location” online. You’ll often find diagrams or YouTube demos for your exact model!
How to Register Your Samsung Kitchen Appliance Online
Once you’ve got all your info, it’s time to actually register your device. Samsung prefers you use their online portal. Here’s a quick walk-through, so you’re not left guessing or getting stuck mid-way:
- Go to the Samsung Registration Page: You can search “Samsung appliance registration” online, or head to Samsung’s main site and look for “Register product” under your account.
- Sign In or Create an Account: Don’t have a Samsung account? You’ll need to make one—it’s free, and you only have to do it once.
- Enter Appliance Details: Plug in your model number, serial number, purchase date, and store info. Double-check for typos; even a single wrong number in the code can mean trouble later for support, replacement, or warranty sync.
- Add Proof of Purchase (if requested): Upload an image or PDF of your receipt. For most kitchen appliances, this step is optional, but some smart units require it to fully pair and unlock software updates or advanced troubleshooting.
- Submit and Save: Once everything’s filled in, hit submit. You should get a confirmation screen—and maybe a confirmation email—showing your appliance is officially registered.
Don’t close your browser too fast! Make sure everything went through, and save any confirmation emails somewhere you won’t lose them. It’s like having a digital backup if you ever need to reset, replace a battery, or seek remote troubleshooting help later.
Registration by Phone or Mail: Old-School Options
While most folks these days register their Samsung kitchen appliances online, maybe you’re not super comfortable with computers—or maybe you just like old-school methods. Don’t worry, Samsung gets it. You have two more options: phone and mail.
- Phone: You can call Samsung’s support number (found on their website or your appliance’s manual). Have your model, serial, and purchase info ready, and a support rep will walk you through the process.
- Mail: Some products include a registration postcard in the box. Just fill it out with your info—same details as the online process—and drop it in the mailbox. It’ll take longer, but it’s still effective.
Here’s a tip: Even if you register by phone or mail, **take a picture of all your codes and your filled-out card or email yourself a note with the details**. That way, if you ever need to troubleshoot, sync your remote, reset a password, or pair your smart appliance down the line, you’re not stuck hunting for lost paperwork.
What Happens After Registration?
Let’s say you’ve finished the process—you’ve entered all the numbers, uploaded your receipt, and got that cheery confirmation message. So, what now? Well, registering your Samsung kitchen appliance unlocks a few helpful perks:
- Warranty Activation: Your warranty starts ticking from your purchase date, not just the manufacturing date. This can mean extra months of coverage (and saved money on repairs) if you bought an appliance sitting in a warehouse.
- Faster Support: If your fridge needs a reset, your smart oven won’t pair with the app, or you have battery/code errors with your remote, Samsung’s support team already has your info and can jump straight into troubleshooting.
- Recall Notifications: If there’s ever a safety issue, you’ll get an email, call, or mail notice, so you’re not left in the dark.
- Access to Updates: For smart appliances, some features (like syncing with other devices, code-based upgrades, or advanced pairing options) become available only after registration.
It’s a bit like having a VIP pass at a concert—support just goes smoother and you’re always in the loop. If you ever need a service technician, you won’t have to scramble for forgotten codes or paperwork.
Common Registration Problems (And How to Solve Them)
Registering your Samsung kitchen appliances is pretty straightforward, but sometimes things don’t go as planned. Maybe the website won’t accept your code, the serial number looks wrong, or you get stuck on the proof of purchase step. Don’t panic—these are common hiccups, and they’re all fixable.
- The website doesn’t recognize my model or serial number: Double-check for typos. Serial numbers can include sneaky zeroes and capital “O”s, or even dashes you missed. Check the location guide again and try re-entering the info.
- I can’t find my receipt: If you bought online, check your email purchase history. Most stores can re-print or re-send receipts if you ask. For older appliances, you may still register but warranty terms could be limited.
- The registration form won’t accept my purchase date: Make sure the date format matches (mm/dd/yyyy vs dd/mm/yyyy). Try a nearby purchase date if you can’t remember the exact one—just stay honest.
- I have a smart or connected appliance and can’t pair it: Some devices require registration before you can sync, pair with a remote, or use voice commands. Check your appliance’s manual for extra steps or codes.
Here’s the simple truth: if you run into a wall, Samsung’s customer support is usually pretty responsive—call or chat with them and they’ll walk you through the reset, code retrieval, or registration fix.
Do You Need to Register Every Appliance?
You might be wondering, “If I have a whole Samsung kitchen suite—fridge, oven, dishwasher, microwave—do I need to register each one?” The answer is: **yes, you should**. Each appliance has its own model, serial, and warranty tracking. Even if you bought them as a bundle, Samsung needs the unique info for every device.
This matters a lot if you ever need troubleshooting, a replacement part, or a warranty claim—especially for smart appliances that use separate apps, remotes, or pairing codes. If one device needs a reset, code update, or battery change, you want to be sure Samsung can identify it quickly.
If you’re overwhelmed, set aside a little time each day and tackle one appliance at a time. Pop open the microwave during lunch, check the fridge when you grab a snack, and so on. By the end of the week, your kitchen will be fully registered and set for smooth support.
Final Thoughts: Make Registration a Habit
Registering your Samsung kitchen appliances might seem like a chore, but it’s a lot easier—and honestly more useful—than most people think. With a bit of prep (model and serial numbers, purchase info, and maybe a quick receipt photo), you can get peace of mind in just a few clicks. It’s your fast pass for warranties, troubleshooting, and remote support, plus you’re first in line for any important safety updates.
The next time you buy something for your kitchen, add “register appliance” to your unboxing ritual. It’s worth the ten minutes, and your future self—hungry, tired, or in desperate need of a code—will thank you. If you ever need to reset, pair, replace a battery, or get a service tech, you’ll be ready. Happy cooking, and here’s to a worry-free (and well-supported) kitchen!